Point of sale (POS)
Open a register, scan or search products, take payment in any mix of methods and print the receipt at the counter.
The POS is the billing screen your cashiers use all day. It is built for speed: scan an item, take payment, hand over the receipt. This page walks through a complete sale, from opening the register to closing it at night.
To open it, choose Sell → POS in the left menu. Use the ⌂ Backend button at the top left to go back to the main app.
#Open a register session
Before you can sell, you start a shift by opening a register.
- On the POS you will see Open a register. If your workspace has more than one store, pick the store in the top bar first.
- Choose the Register (for example "Register 1").
- Count the cash in the drawer and type it in Opening cash.
- Click Open register.
The bar below the header now shows Register open with the register name and start time. Each register can have only one open session, and each person can have only one open session at a time. See Registers for the full shift story.
#Find products
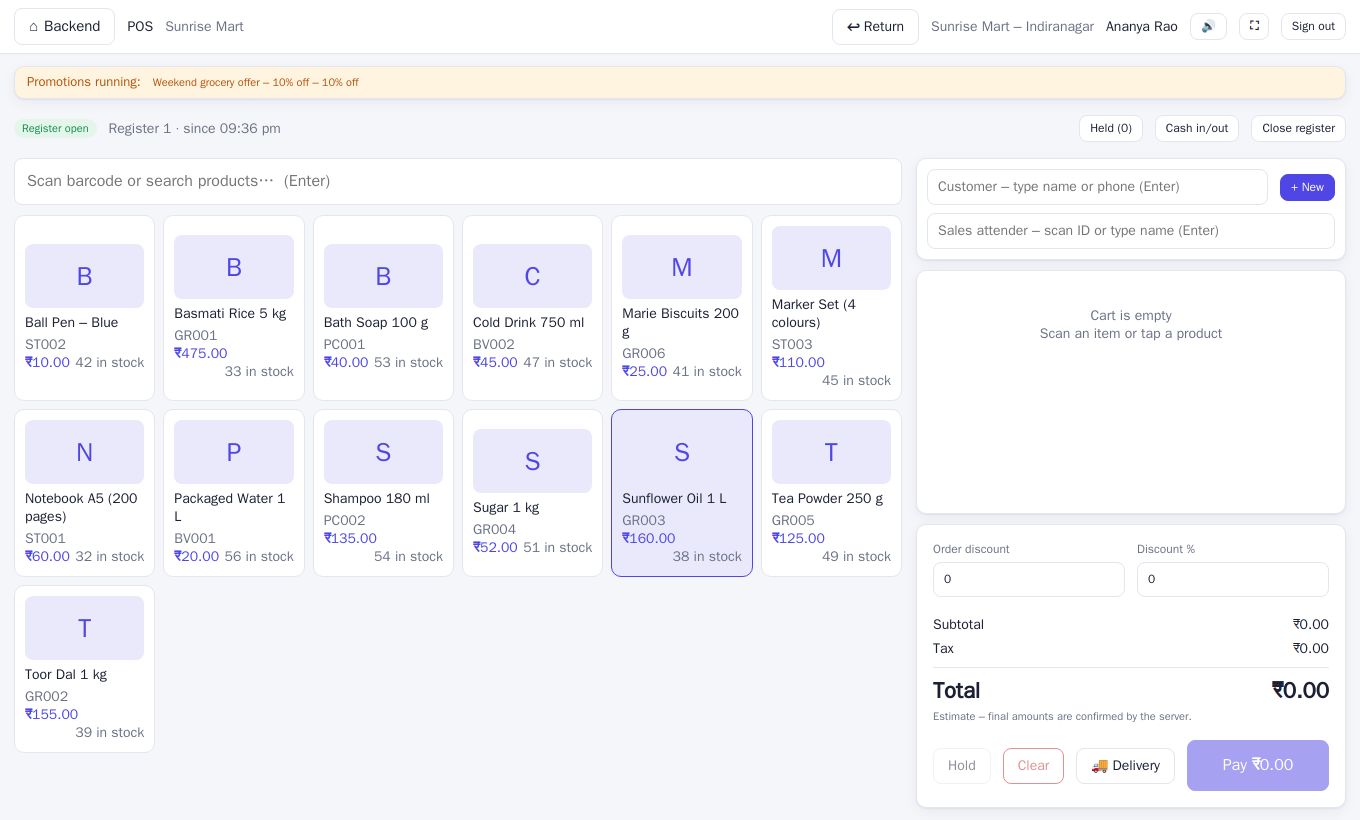
The big search box at the top left is always ready for typing or scanning.
- Scan a barcode with your scanner. The item goes straight into the cart and the POS beeps. The speaker button at the top turns the scan sound on or off.
- Type a name or code and the tiles narrow down as you type. Press Enter to add an exact match.
- Tap a tile to add that product. Each tile shows the price and how many are in stock.
- Products with sizes or colours show a variants badge. Tapping one opens a list so you can pick the right variant.
If you scan something that is not a product, the POS checks whether it is a sales attender's ID badge before giving up. If nothing matches you will see "No exact match – pick from the list".
#Work with the cart
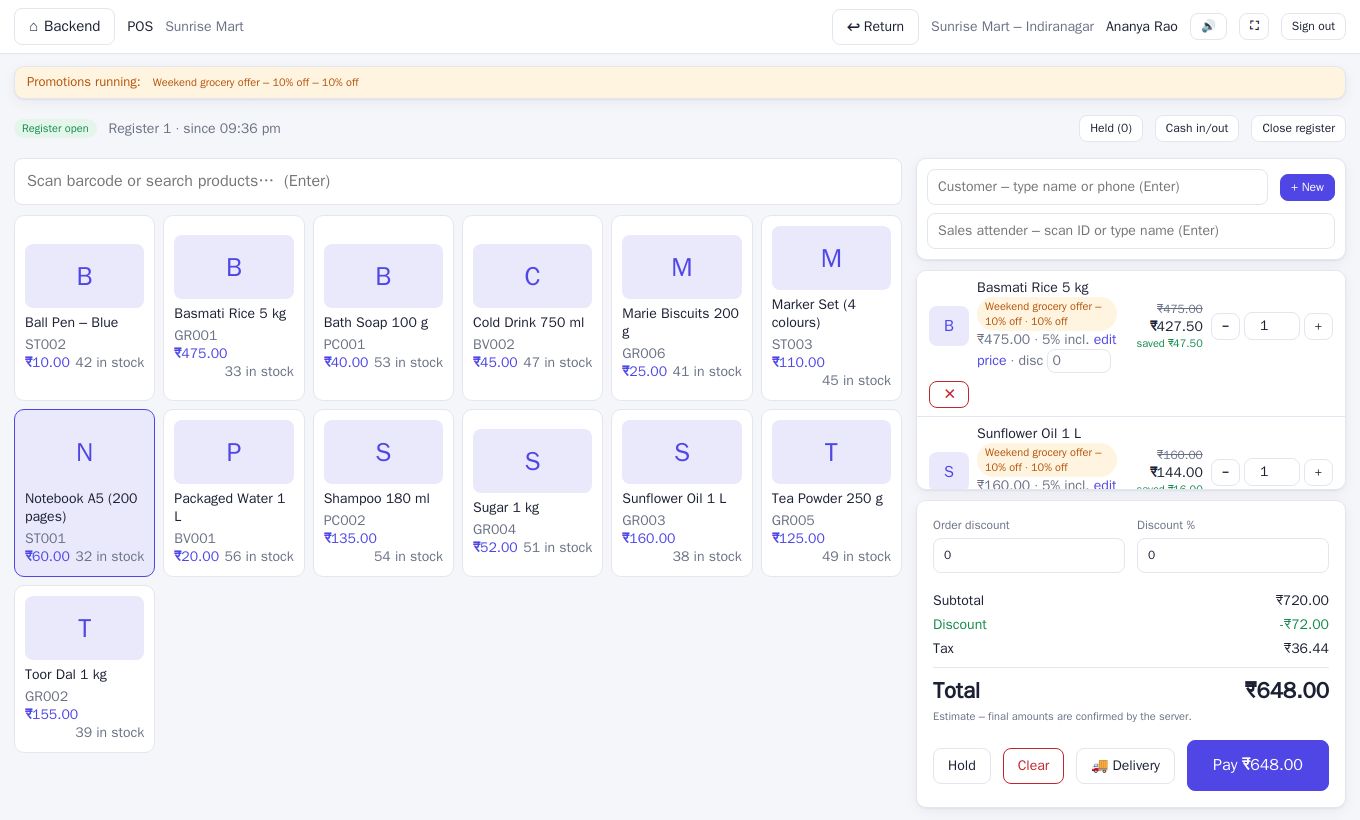
Every item you add appears in the cart on the right.
- Use − and + to change the quantity, or type a number in the box. Setting it to 0 removes the line. The red ✕ removes the line directly.
- Scanning or tapping the same item again adds one more to the existing line.
- Each line shows the price and the GST rate, marked incl. or excl. depending on how the product is priced.
- edit price lets you change the price for that sale (needs permission).
- disc is a rupee discount for that one line (needs permission).
- For products that track serial numbers, click serials and enter one serial per unit, separated by commas.
Below the cart, Order discount (a rupee amount) and Discount % take money off the whole bill. The totals box shows Subtotal, Discount, Tax, any Round off, and the big Total. Whether totals round to a whole rupee is a setting in Settings → Business.
#Customer and sales attender
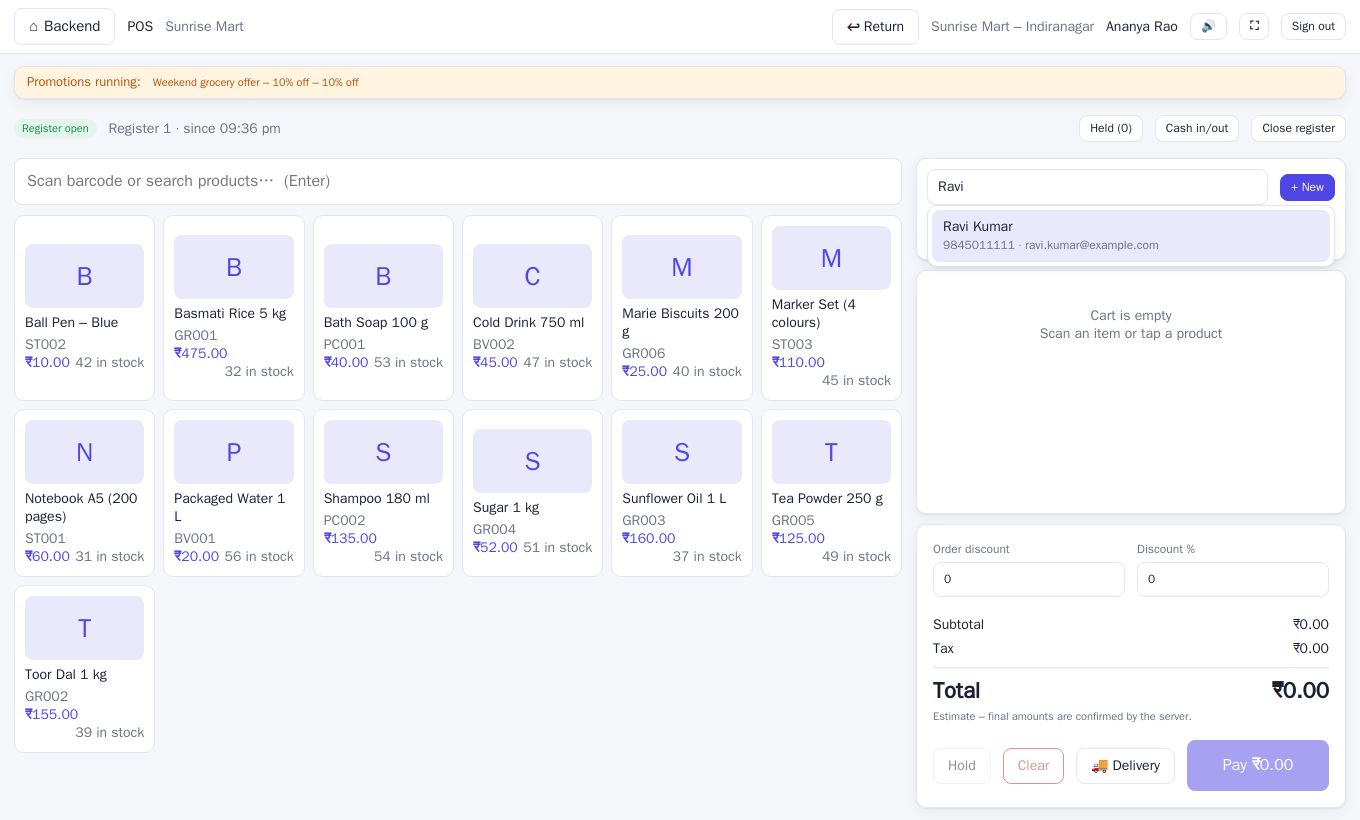
At the top of the cart:
- Customer – type a name or phone number and pick from the list. Press Enter to take the first match. Leave it empty for a walk-in sale.
- + New adds a customer without leaving the bill. If the phone or email already belongs to someone, you are warned with This looks like an existing customer, and you can click Use this customer instead of creating a duplicate.
- Sales attender – scan the staff member's ID badge or type their name. This credits the sale for incentives. It appears only on plans that include attenders. See Attenders and incentives.
Choosing a customer also shows their group and loyalty points, if you use those. See Customers.
#Promotions and group discounts
When a promotion is running for your store, a yellow Promotions running bar appears at the top, and matching cart lines show a badge such as "10% off" with the amount saved. You do not need to do anything.
If a customer belongs to a group with a discount, the line is discounted by whichever is bigger, the promotion or the group discount. They are not added together. Promotions are set up in Calendar and promotions and need a plan that includes the calendar.
#Hold and resume a sale
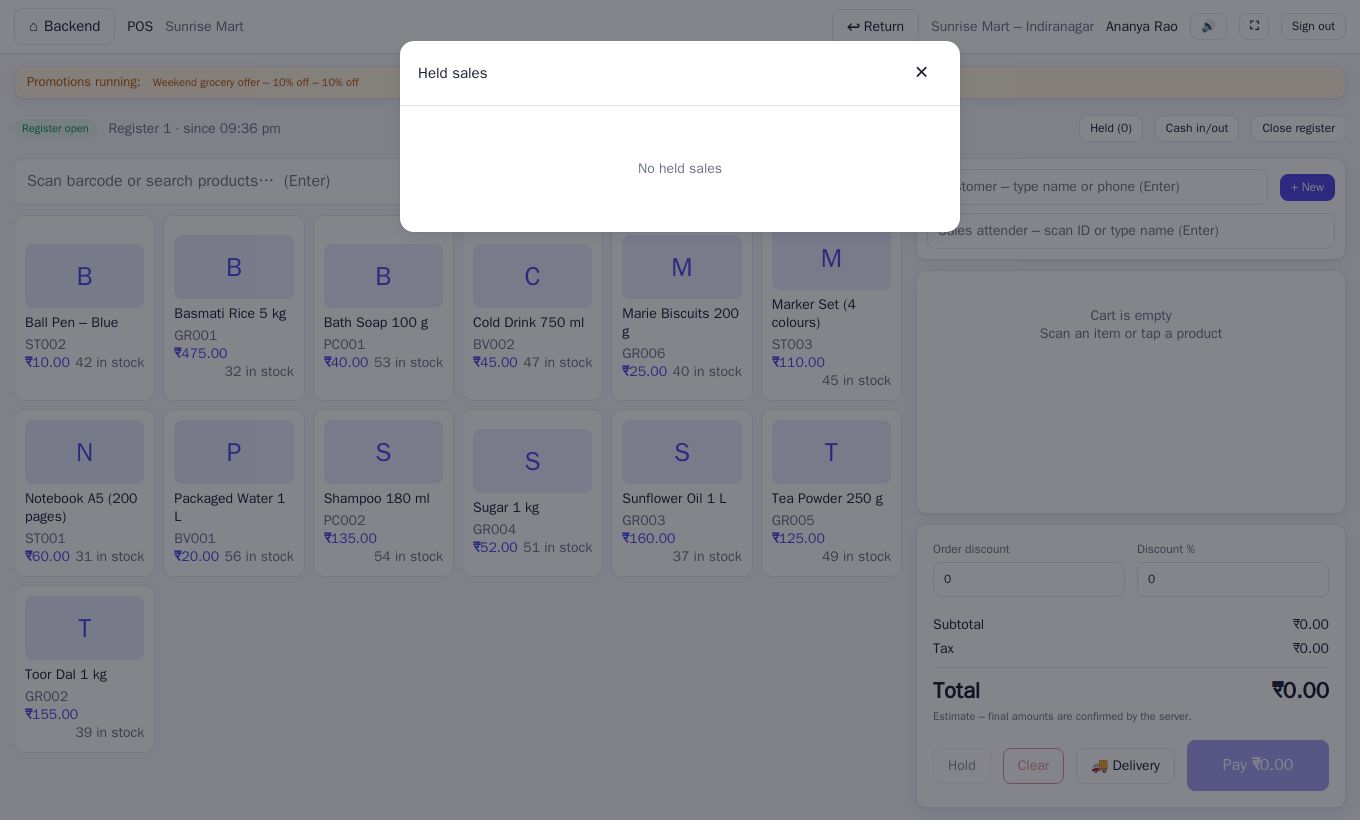
Customer remembers something at the shelf? Park their bill.
- Click Hold and, if you like, give the sale a name.
- Serve the next customer.
- Click Held (n) at the top and choose Resume next to the bill. Discard deletes it.
You only see the sales you held yourself. After resuming, check the customer, attender and any discounts, because line discounts are not carried over.
#Take payment
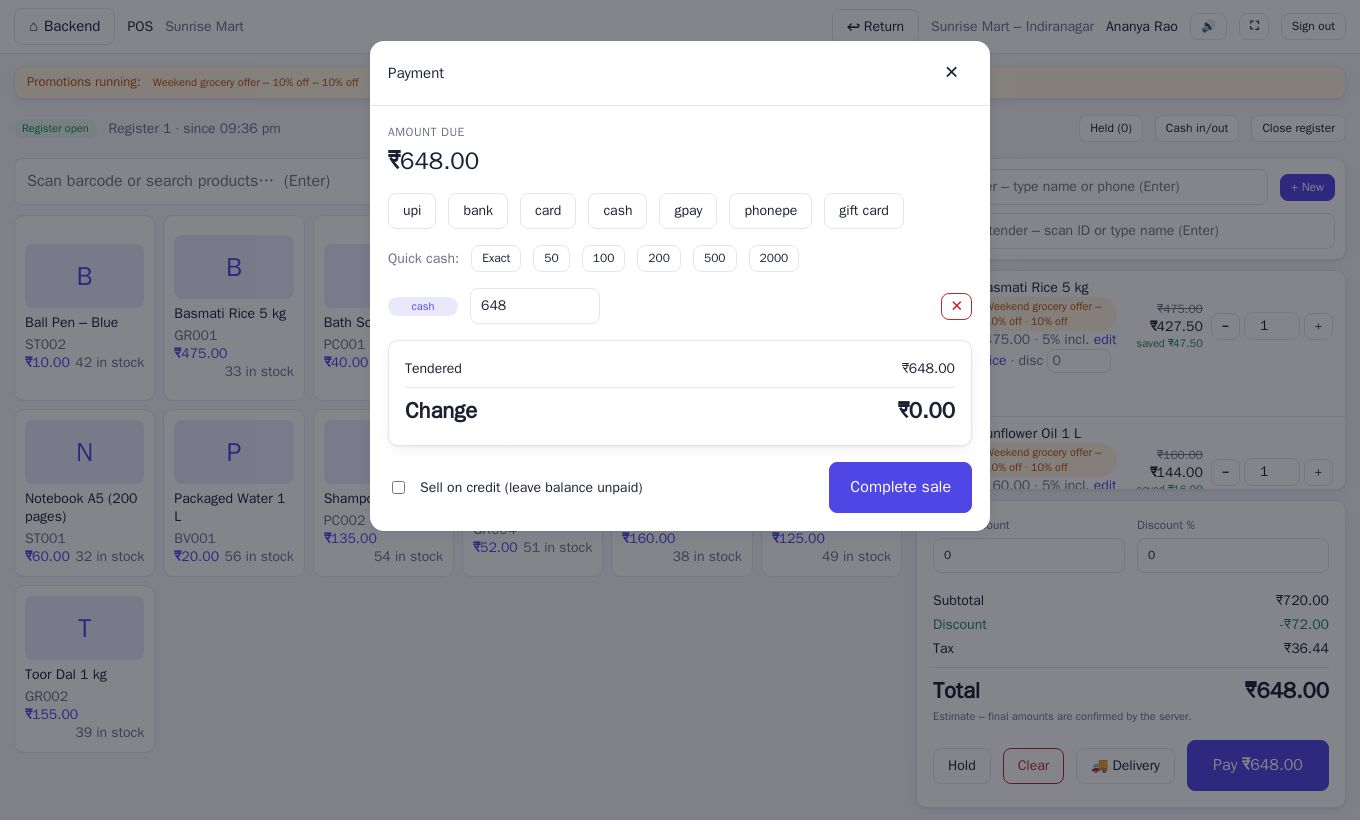
Click the big Pay button. The Payment window opens with the Amount due and a button for each payment method your shop has switched on (Settings → Payments): cash, card, upi, gpay, phonepe, bank, gift card and other.
#Cash
Cash is filled in for the full amount automatically. For a customer who hands over a note, tap a Quick cash button (Exact, 50, 100, 200 and so on) or type the amount received. The window shows Change to give back. You can change the quick-cash buttons in Settings → Payments.
#Card, bank and other
Pick the method, check the amount and optionally type the Reference / txn id from the card machine or bank slip.
#UPI, GPay and PhonePe
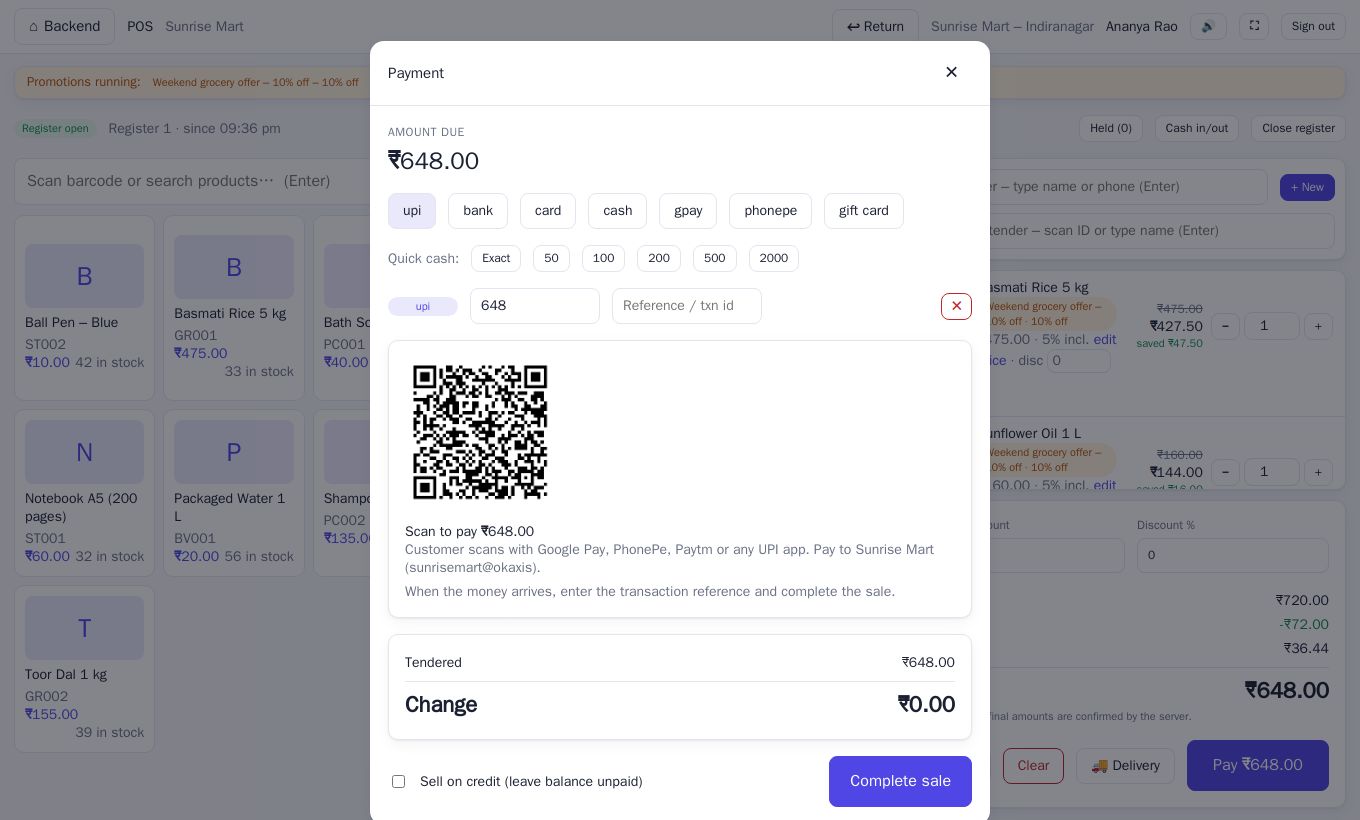
Choosing one of these shows a QR code for the exact amount. There are two kinds, depending on what the owner has set up.
Simple UPI QR (Settings → UPI). The shop's UPI ID is turned into a QR. The customer scans it with any UPI app and pays. When the money arrives in your app or SMS, type the transaction number in Reference / txn id and complete the sale. Nothing confirms the payment automatically, so the cashier must check. If Require the transaction reference before completing a UPI sale is ticked, you cannot finish without the reference.
Cashfree dynamic QR (Settings → Cashfree QR, Business plan). If the owner has connected a Cashfree account, you see Show Cashfree QR (reference fills in by itself) instead. Click it and a one-time QR appears for the exact amount, with "Waiting for the customer to pay…". Once the customer pays, it turns into ✓ Payment received and the reference fills in on its own. You cannot complete the sale until the payment arrives.
A few things to know about the dynamic QR:
- The minimum is ₹1, and the QR expires after a while. Click Create a new QR if it does.
- If you change the amount, the old QR is dropped and you create a new one.
- If you close the Payment window after money was received, the POS warns you, because that payment will not be attached to a sale.
- Voiding a sale does not refund the customer's UPI money. Refunds are made from your Cashfree dashboard.
#Gift cards
Choose gift card, type the card Code and click out of the box. The balance appears and the amount is limited to it. See Gift cards.
#Split payments
Click more than one method to split the bill, for example ₹500 cash plus the rest on UPI. Change each amount in its row. The window shows Tendered and either Change or Remaining. Only cash can be over-tendered, because cash is the only method that gives change.
#Sell on credit
If the customer will pay later, tick Sell on credit (leave balance unpaid). Without it, the Complete sale button stays disabled until the full amount is tendered. The unpaid balance is collected later from the sale. See Sales and invoices. It is wise to pick a customer for credit sales so you know who owes you.
#Redeem loyalty points
If your workspace uses loyalty points (Growth plan and above), picking a customer shows their balance, such as "★ 33 points (worth ₹33.00)". Tick Redeem points to use them. The whole balance is applied, up to the bill amount, and To pay shows what is left. The checkbox is greyed out if they have fewer points than the minimum, shown as "min n pts". Points are earned automatically on the amount actually paid.
#Delivery from the POS
On plans with delivery management, click 🚚 Delivery to send the order to the customer. Fill in the Delivery address, an optional Date & time, Time slot, Delivery charge and Instructions, then Save. The charge is added to the bill. The order shows up on the Deliveries page, where an agent is assigned. For cash on delivery, leave the payment unpaid. See Deliveries.
#Receipt and printing
Click Complete sale. The Sale complete window shows the receipt with your shop name, invoice number, items, discount, GST split, total and how it was paid.
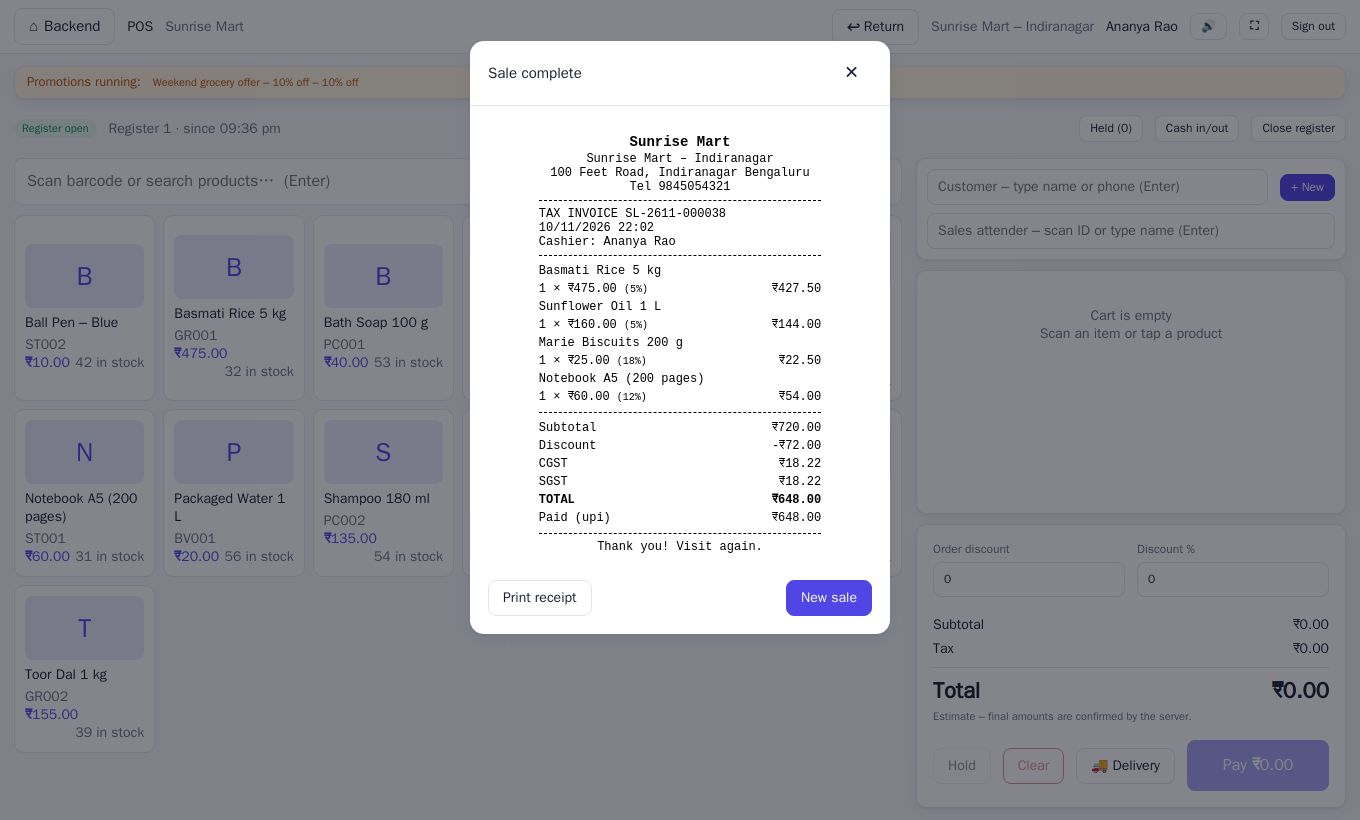
Click Print receipt to print, then New sale to start the next bill. The receipt layout and printer options are in Settings → Receipt and Settings → Hardware (see the Settings guide). You can reprint any receipt later from the sale. If your plan allows it, you can also email, WhatsApp or SMS the invoice.
#Returns at the counter
On plans with returns, the ↩ Return button at the top finds an earlier sale by invoice number and processes the return right there. See Returns and refunds.
#Cash in/out and closing the register
- Cash in/out records money added to or taken from the drawer, such as petty cash or a bank deposit, with a reason.
- Close register asks you to count the drawer and shows how the count compares with what the system expects.
Both are explained in Registers. If you try to sign out while the register is open, the POS asks you to confirm.
#Use the POS on a phone or tablet
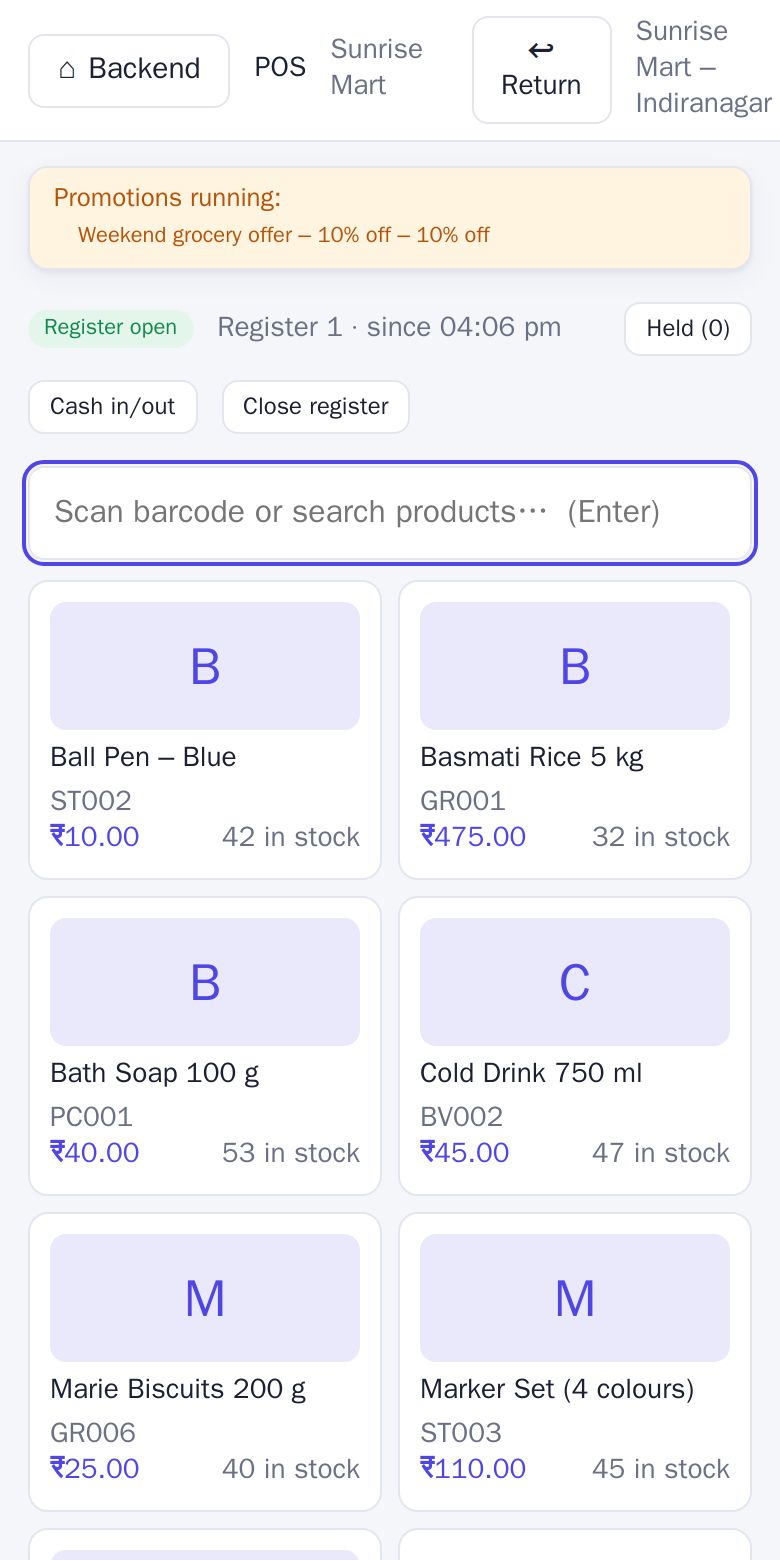
The POS works in a phone browser too. The screen rearranges to fit a narrow display: the product tiles sit in two columns and the buttons wrap onto extra lines. Scroll down to reach the cart and the Pay button. A tablet works well as a second counter.